In “Groups” you may group staff members according to department or job role and set identical travel policies for them. Users with the role of Master, Travel Manager, or Finance may create and edit groups.
Advantages of this new section
- You may set an approval process for large groups of staff members simultaneously instead of filling in information for each individual separately.
- You may select a personal travel manager for each group. With this option, they may only book travel services for their group and won’t have access to other groups.
How to create a group
- Open the section “Office settings” → “Groups”.
- Click “Add new” and create a group.
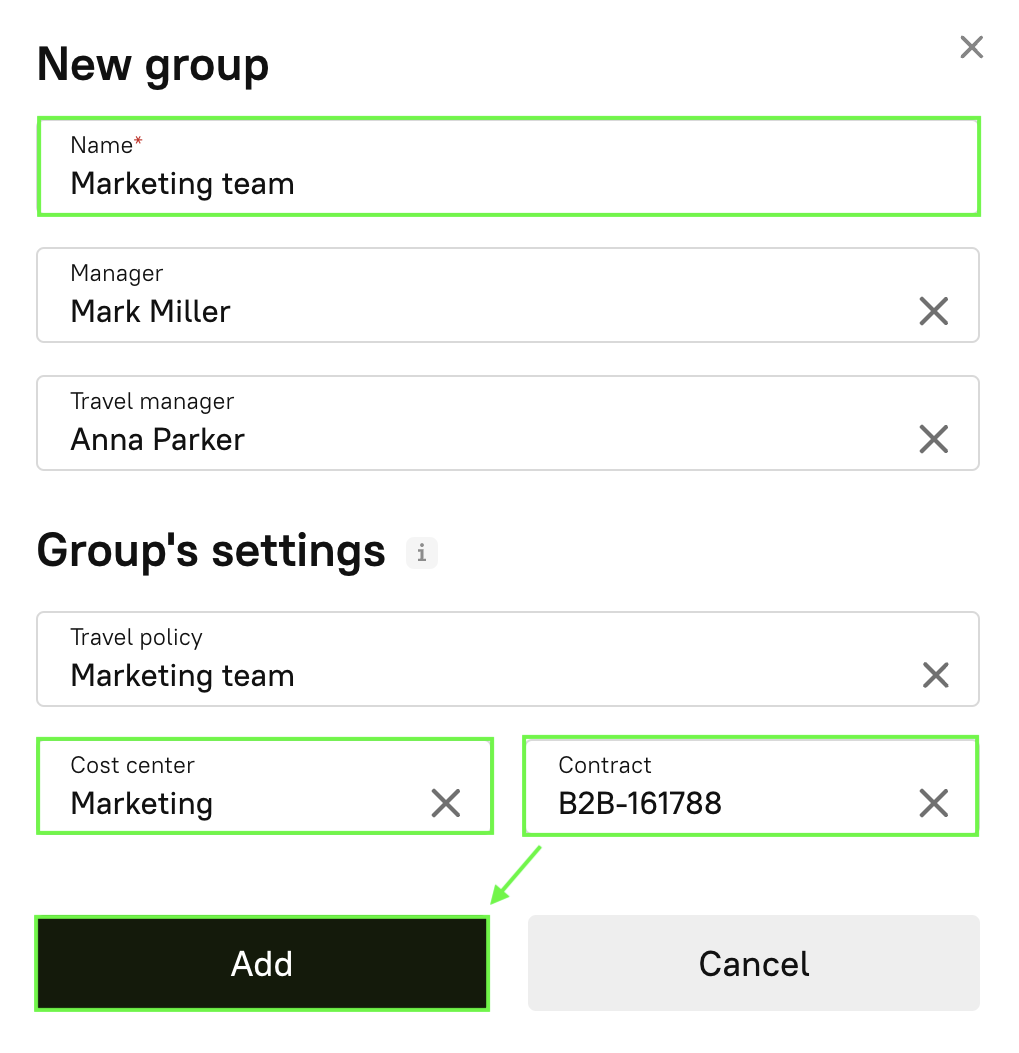
How to set a group
When creating a new group
- Name the group (up to 500 characters, for example, Marketing Team, HR Team).
- Select a leader (optional).
- Appoint one or more travel managers (optional).
- Set the general rules for all group members (cost center, travel policy, contract).
- Click “Add”.
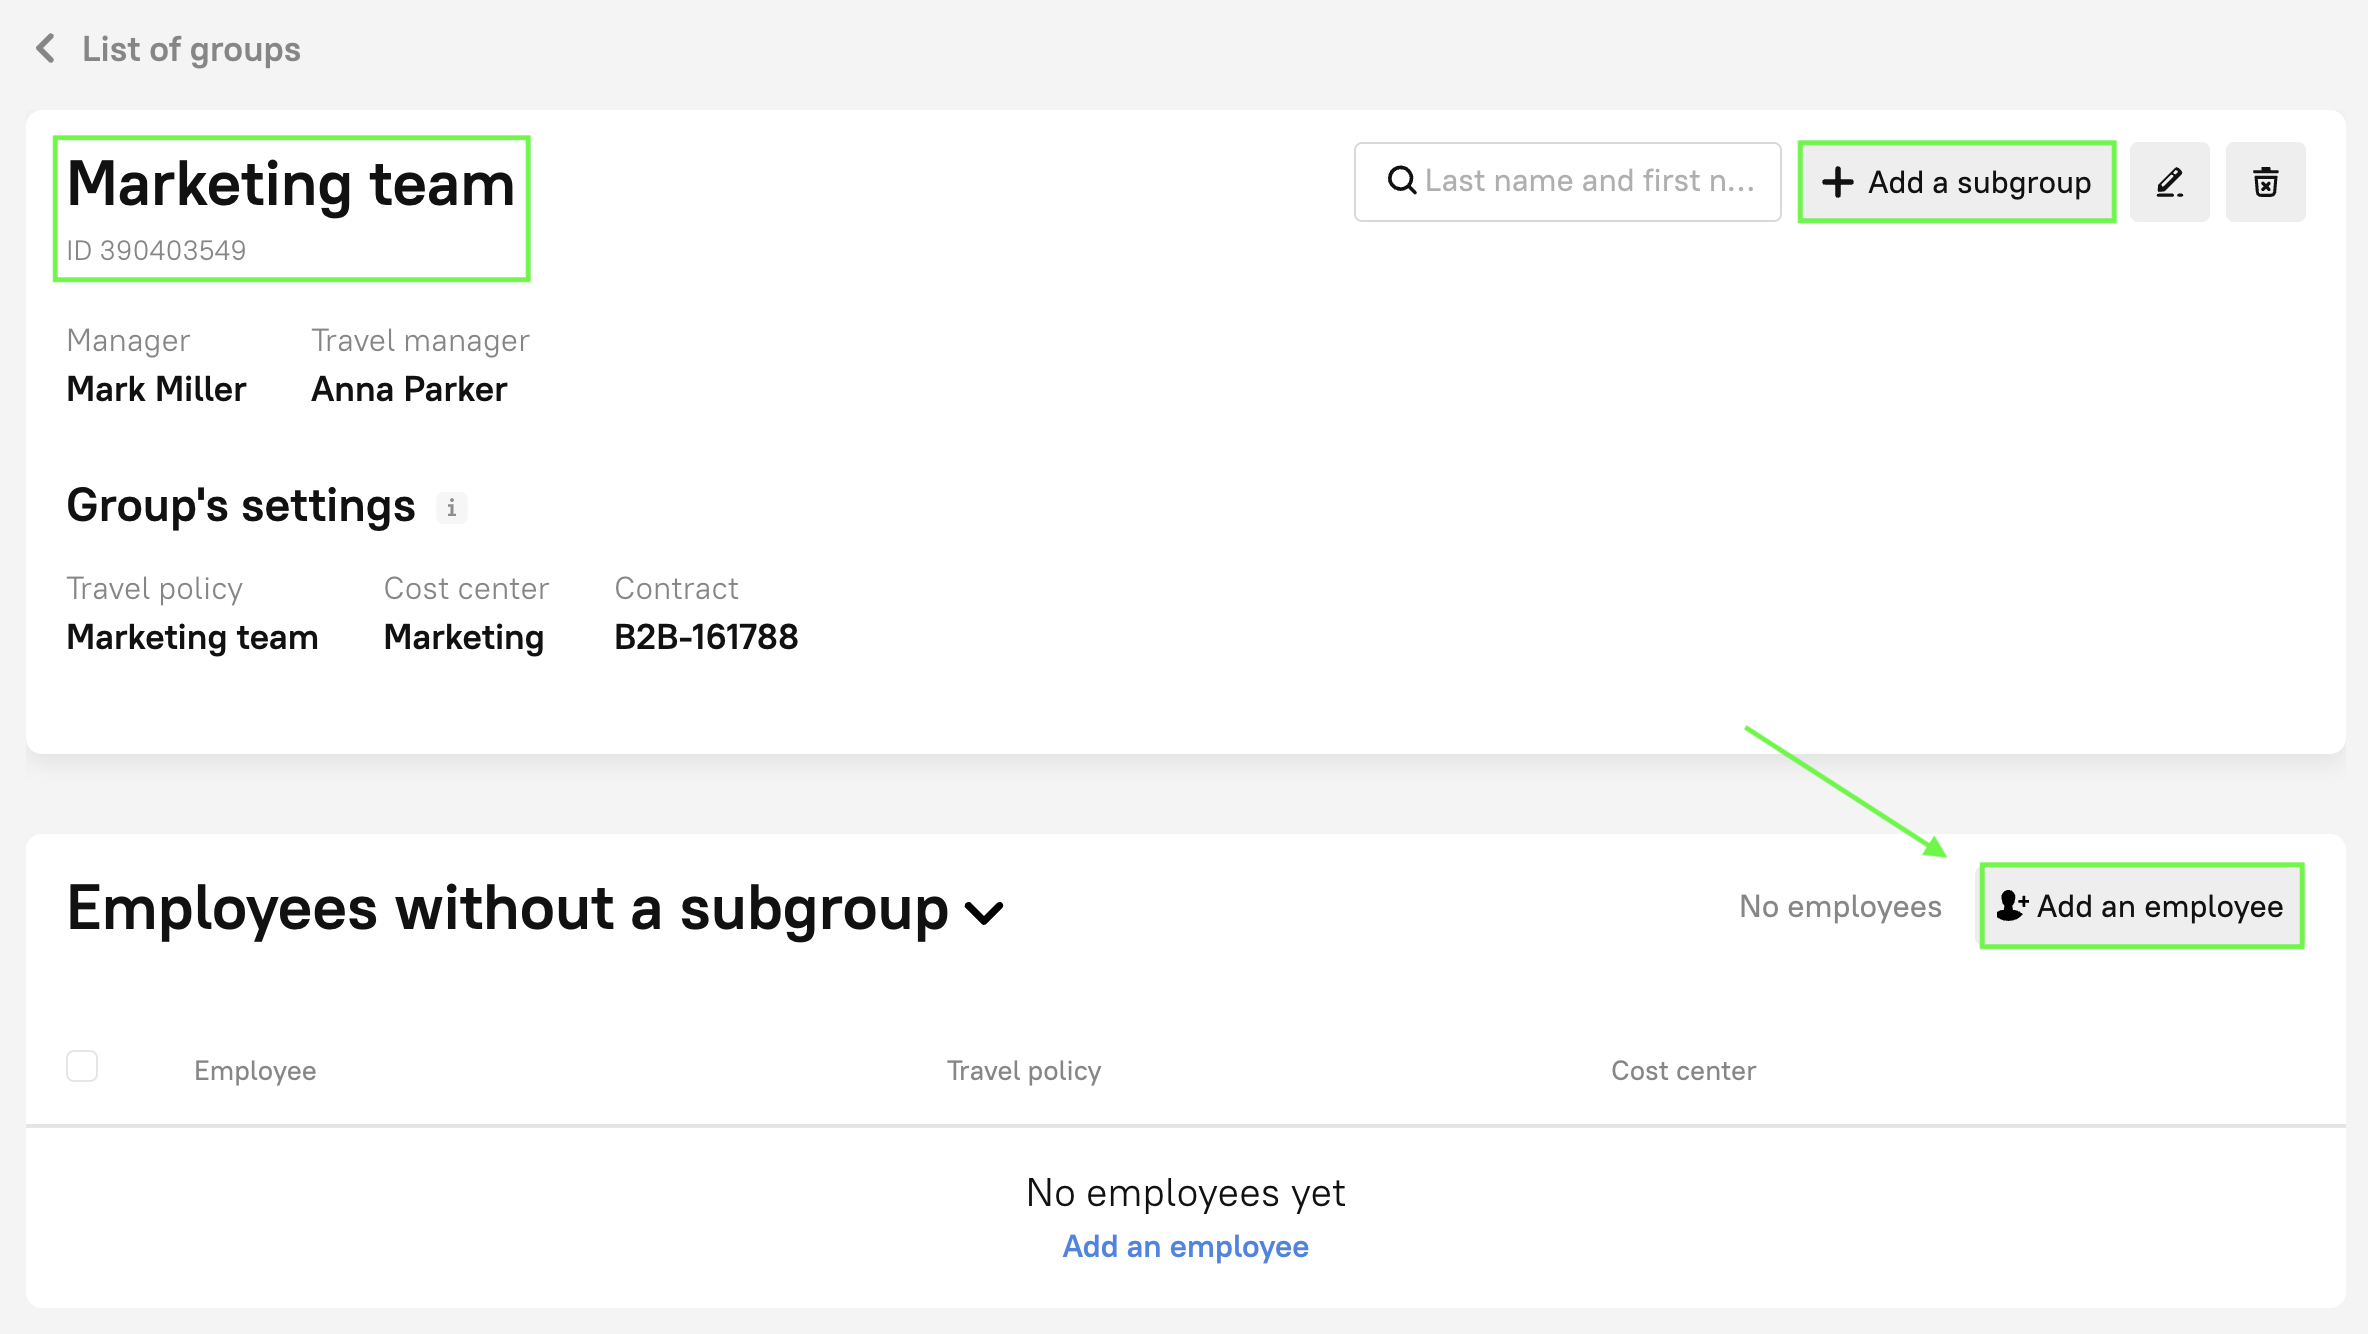
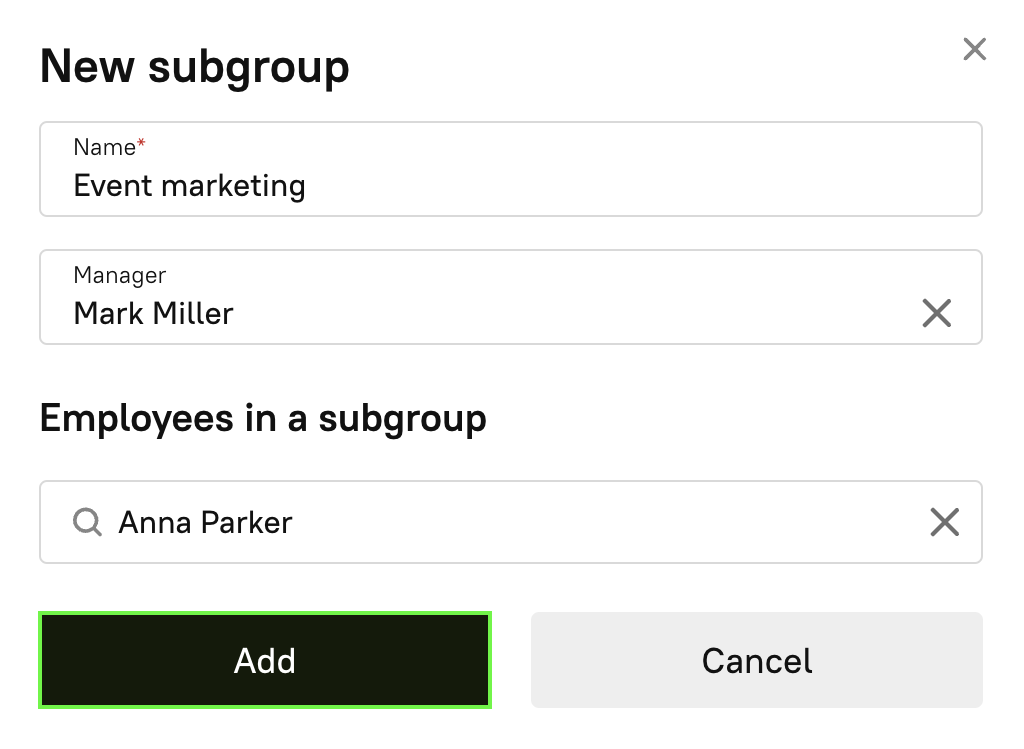
For even smoother business travel planning, you may create a “subgroup ”within a group. A subgroup will not have its own settings, but will adopt those of its main group. You may create a new subgroup using the button in the top right corner in the group’s separate profile page.
To add staff members to a group
- Go to the required group.
- Select the required subgroup (or, if you haven’t created any, choose “Staff members without subgroup”).
- Click “Add staff member”.
To save you from manually adding each staff member, simply, send an Excel file to your account manager. The table should contain the name and surname of the staff member, plus, the group’s or specific subgroup’s ID.
Important
The travel policy, cost center, or contract for a particular staff member will always take priority over the general group settings.
If the booking conditions for a particular staff member are different (for example, for a leader), you may change their personal settings using the Edit button next to their name.
We realize how much effort and focus is required when working with the important data of each staff member—we hope this new section will relieve you of your monotonous routine.
Try the Groups section today and see for yourself how it simplifies the booking process and saves you from unnecessary travel-booking stress.
If you have any more questions, please contact your account manager.
Cover photo: benzoix /freepik.com